This article will guide you through a clean installation of LiveAgent. If you would like to update your installation to the latest version then please follow this article instead.
Step 1
Download the distribution zip file from https://members.qualityunit.com/customer/ and note down your license ID, you will need it later. Upload the package (ZIP file) to your server if you can unzip it directly there, if not, then you have to unzip it in your computer first and then upload all files to the server.
Step 2
Make sure that there is a /var directory in your LiveAgent directory and if there isn't one then please create one. Set both /accounts and /var directories to CHMOD 777 so that the installer can populate all the needed files to these directories.
Step 3
Run installation - if you uploaded LiveAgent to directory /liveagent/ then the URL of installer is https://www.yoursite.com/liveagent/install/
Step 4 - Installation
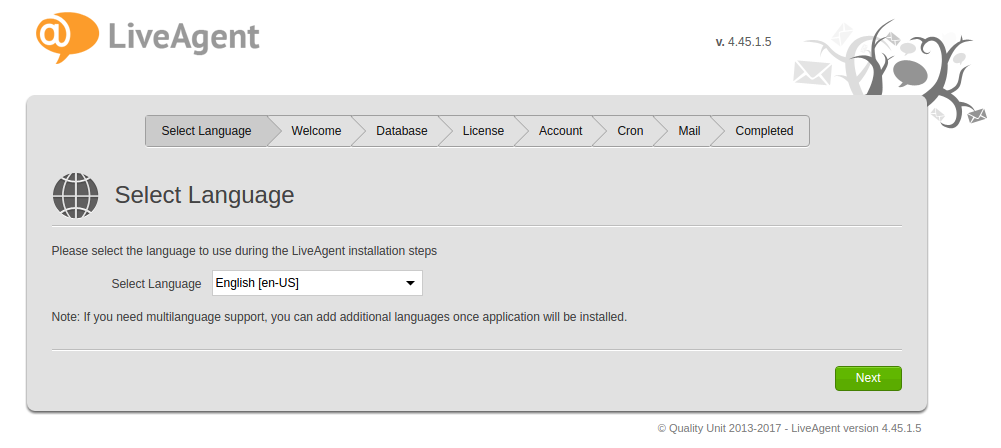
The installation is very simple. In the first step you have to choose a language of the installation. The language will be used for setting the application language as well. You can import multiple languages for your agents later.
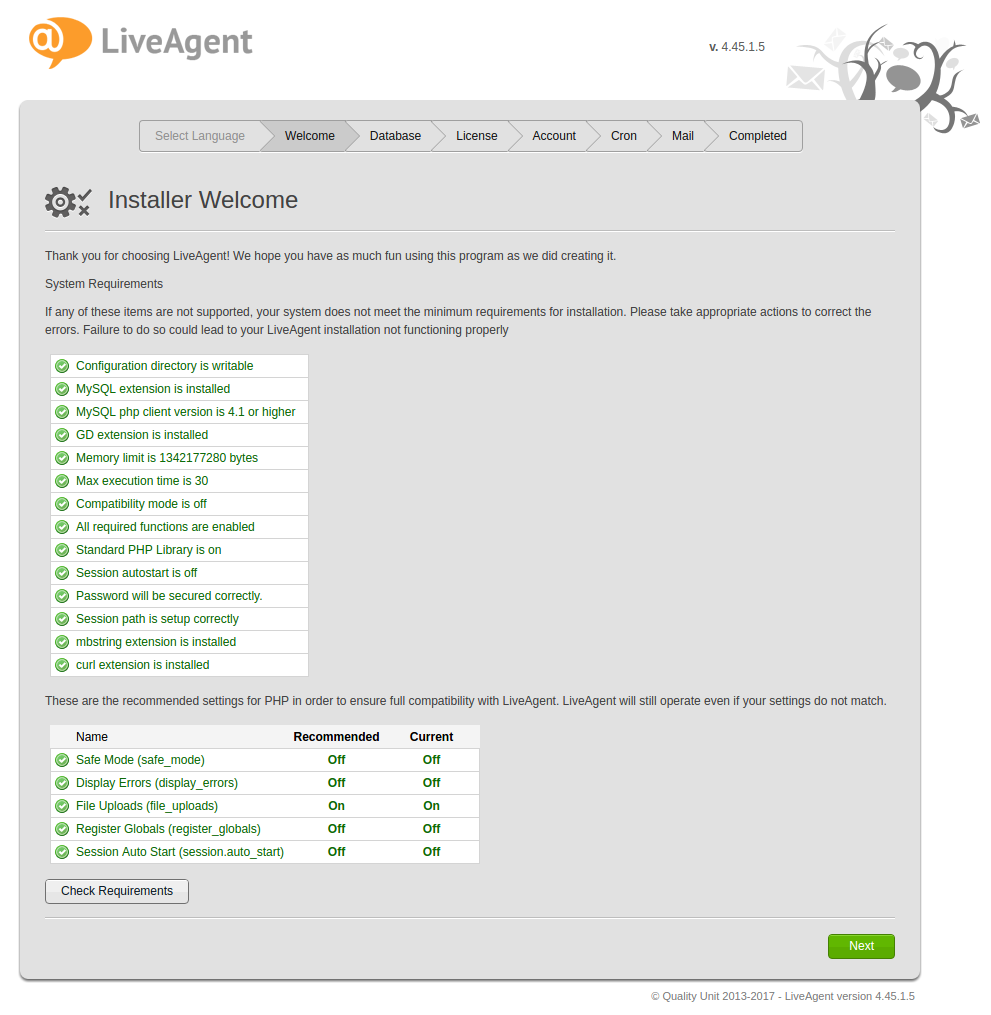
After choosing a language you will be presented with a welcome screen which checks your server configuration and whether it meets the requirements.
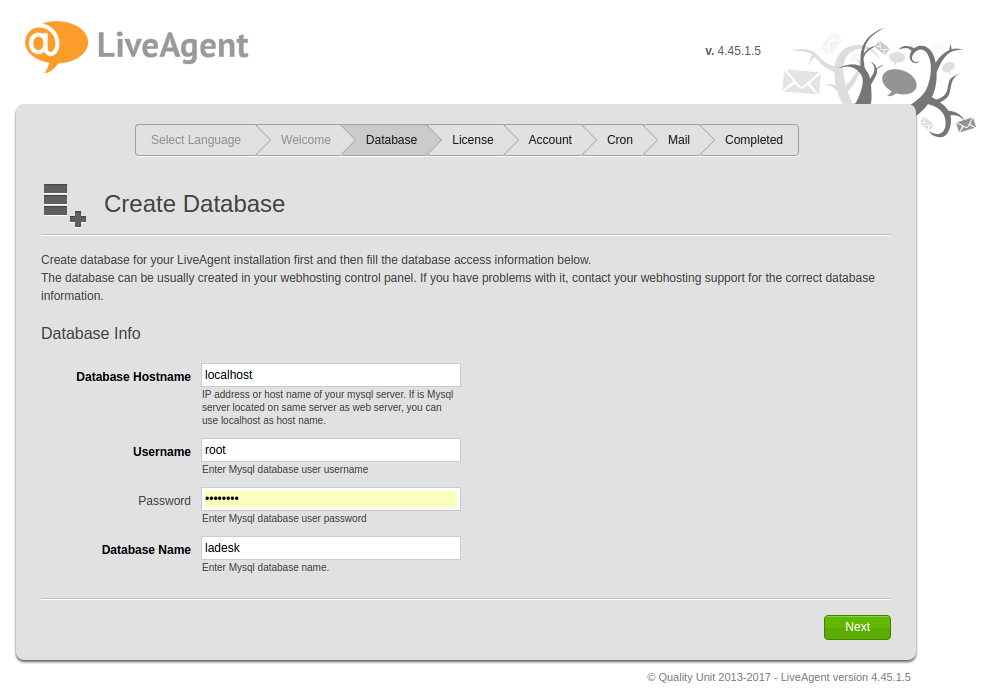
After checking the requirements you have to define your database details to be able to install your new LiveAgent. Make sure that the database uses utf8mb4_general_ci collation.
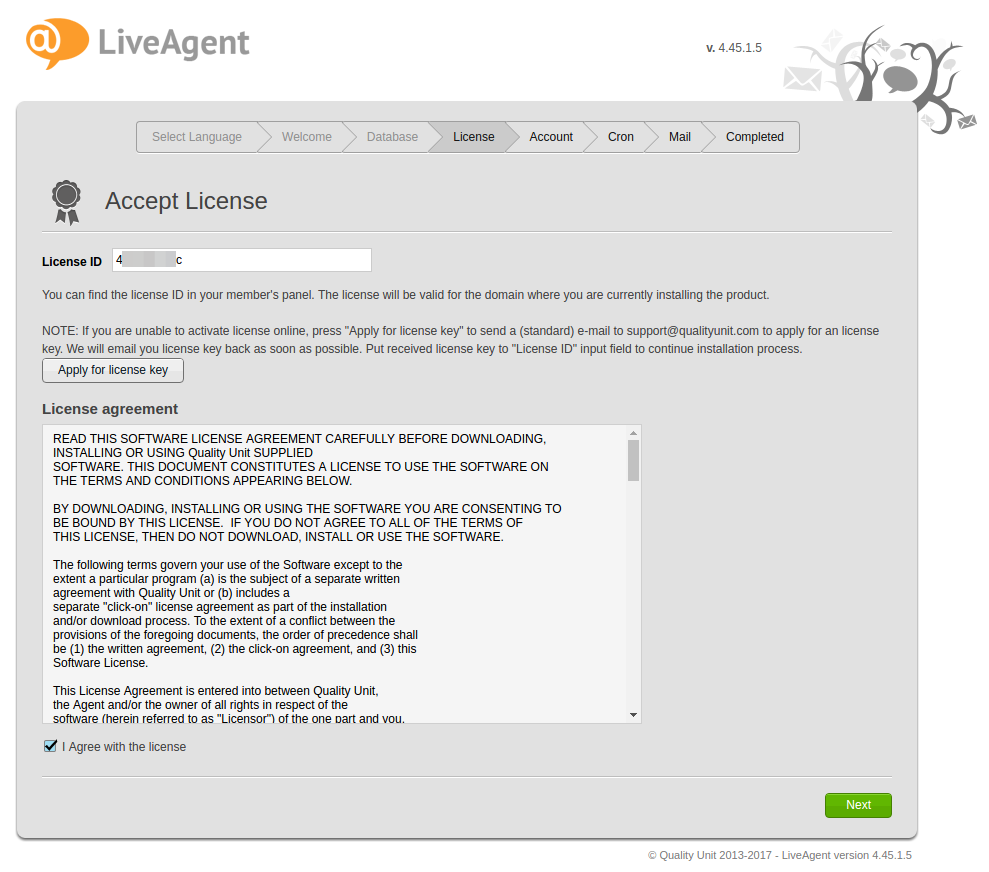
Once the data are added in the database you have to enter your LiveAgent license ID that can be found in members area ( https://members.qualityunit.com/customer/ ) and agree with license.
After validating the license ID you need to enter your owner (administrator) information which you will use to log in to the software.

When the account is created you will be asked to set up the cron jobs on your server. Cron jobs are required for the application to run correctly and therefore this step can't be skipped. The application needs to register the first cron job execution and then it will let you through when you click on 'Next' button. We recommend to set cron to run every minute. After you set it up you will probably need to wait for a minute before you will be able to continue to next step.
Step 0
Make sure your server where LiveAgent is going to be hosted (installed) meets the minimum requirements.
Make sure your server where LiveAgent is going to be hosted (installed) meets the minimum requirements.
Step 1
Download the distribution zip file from https://members.qualityunit.com/customer/ and note down your license ID, you will need it later. Upload the package (ZIP file) to your server if you can unzip it directly there, if not, then you have to unzip it in your computer first and then upload all files to the server.
Step 2
Make sure that there is a /var directory in your LiveAgent directory and if there isn't one then please create one. Set both /accounts and /var directories to CHMOD 777 so that the installer can populate all the needed files to these directories.
Step 3
Run installation - if you uploaded LiveAgent to directory /liveagent/ then the URL of installer is https://www.yoursite.com/liveagent/install/
Step 4 - Installation
The installation is very simple. In the first step you have to choose a language of the installation. The language will be used for setting the application language as well. You can import multiple languages for your agents later.
After choosing a language you will be presented with a welcome screen which checks your server configuration and whether it meets the requirements.
After checking the requirements you have to define your database details to be able to install your new LiveAgent. Make sure that the database uses utf8mb4_general_ci collation.
Once the data are added in the database you have to enter your LiveAgent license ID that can be found in members area ( https://members.qualityunit.com/customer/ ) and agree with license.
After validating the license ID you need to enter your owner (administrator) information which you will use to log in to the software.
When the account is created you will be asked to set up the cron jobs on your server. Cron jobs are required for the application to run correctly and therefore this step can't be skipped. The application needs to register the first cron job execution and then it will let you through when you click on 'Next' button. We recommend to set cron to run every minute. After you set it up you will probably need to wait for a minute before you will be able to continue to next step.
We strongly recommend 1 minute interval. Longer interval is possible, but it compromises the user experience in LiveAgent application.
Please notice that the cron job command consists of multiple parts: INTERVAL, PATH_TO_PHP_EXECUTABLE and PATH_TO_LIVEAGENT_SCRIPT. The PATH_TO_PHP_EXECUTABLE part is just a placeholder and might not work on all servers, usually it helps when you replace /usr/bin/php part of the command with only php. If that doesn't help then you can follow this guide or ask your server admin / hosting provider support for help.
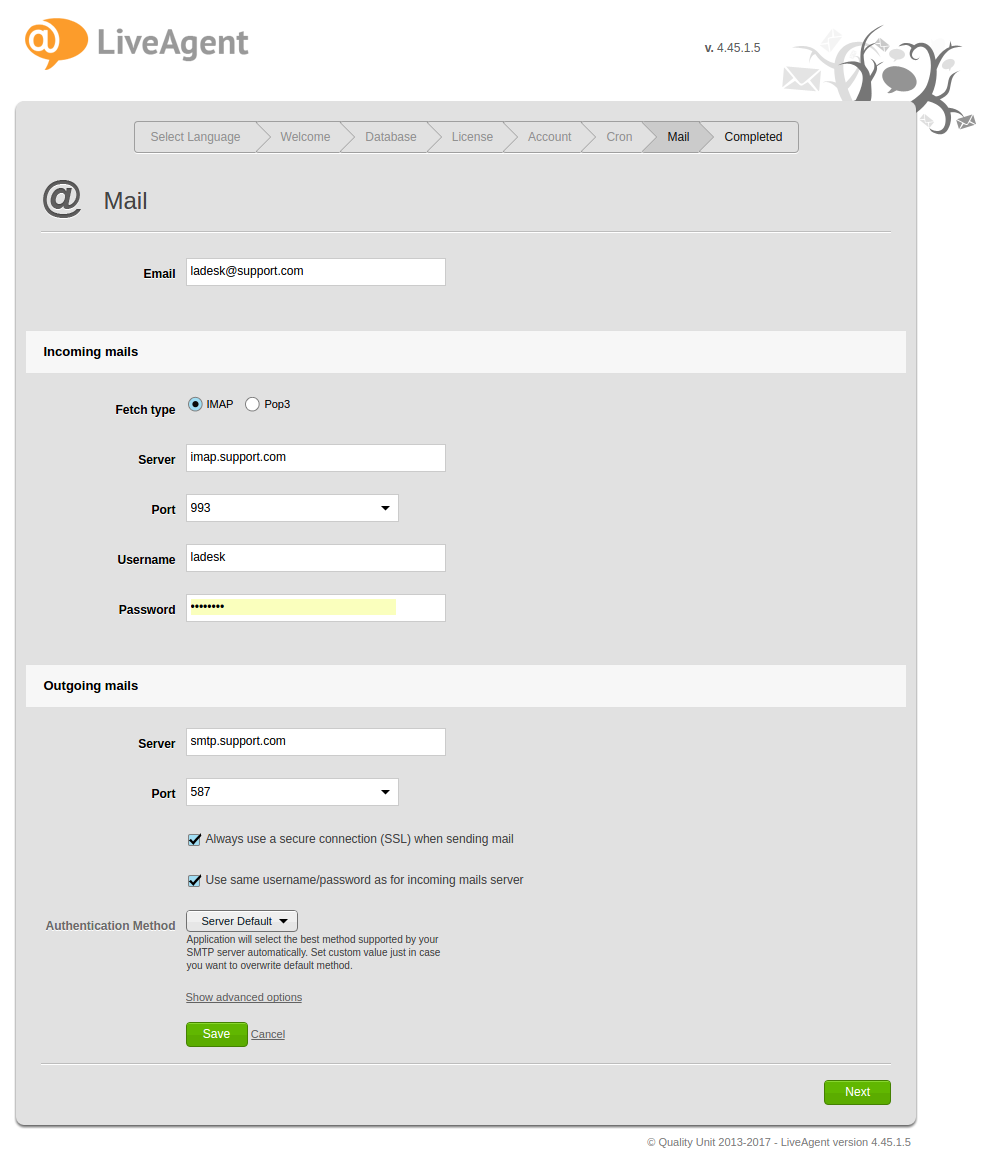
The last step of the installation is to set up your mail account which is used for sending out emails to customers, email notifications, reset password requests and chat transcripts.
If everything is correct you will get this window as the last one:
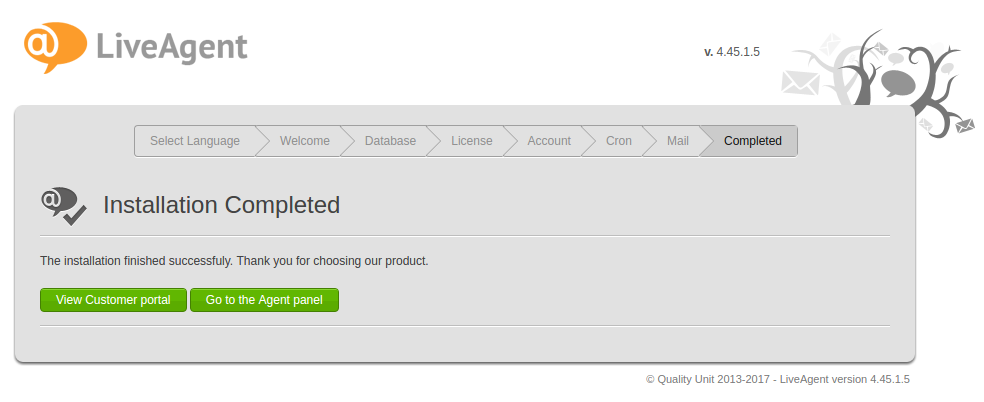
If everything is correct you will get this window as the last one: